Continuing with the 2013 Historicon unofficial theme of BIG games, we have my own Battle of Dresden 1813, run with my own 25/28 mm figures (plus Front Rank Russians by Czar Barry) on Friday night. If there was a game with more 25mm figures on the table at this year's show, I certainly didn't see it! :-) Rules were Field of Battle, 2nd edition by Piquet/Brent Oman. The scenario was previously posted on this blog. I set this one up pretty quickly for a game of its size, with Barry's invaluable assistance throughout - in a little under 2.5 hours. That was all the time we had, between assisting with Tim's game, and at least one of the three component "tables" (there were 12 actual tables used) needed to make our large, U-shaped set up being in use up until that point.
FRENCH:
114 Units total: 62 Infantry, 29 Cavalry, 23 Artillery = 744 Infantry, 232 Cavalry, 144 Artillery, about 40 Command figures = 1,160 figures
TIM as Murat (with son Noah looking on)
PAUL as Victor
KRIS as St. Cyr
ALBERT as Marmont
WILLIAM as Ney
PHILLIP as Mortier
ALLIES:
123 units total: 79 Infantry, 27 cavalry, 19 Artillery = 948 Infantry, 192 Cavalry, 120 Artillery, about 32 Command figures = 1,292
ROBERT as Gyulai
STEVEN as Hessen-Homburg
MICHAEL (?) as Constantine
ALISTAIR as von Kleist, with Dad Duane assisting
GLENN as Wittgenstein
Grand total, 237 units with roughly 2,450 figures on the table, which was 12 x 5 feet in the center, with a 5 x 8 feet wing at either side, for a total of 140 square feet of table! This thus violates Brent's "Rule of Reason" by about a factor of two, but this was one of the largest battles of the era, fought in a relatively confined area.
The players were mix of veteran players (Tim, Philip, Glenn for example), those with some familiarity with the Field of Battle rules and/or Piquet, and those without a clue what they were getting themselves in for! Naturally, having a number of Novice players on both sides slowed tings down a bit - The MOVE card mechanic usually takes players a couple of run-throughs before they really "get" it!

Robert had Gyulai's large Corps on the Allied far Left flank.

Steven had Hessen -Homburgs powerful Corps... although the cards and dice conspired to allow him little effective use of it, I am afraid.

The Prussian/Russian Reserve Corps was next, proceeding counterclockwise around the table. For this game (and the others this year), I used color coded "post-it" notes reversed and stuck to the bottoms of the stands as labels, each with the commander's name and Leadership die. All leaders in the same Corps had the same color labels.

Alistair (aka "The Young Prince" of Gullderland in our Napoleonic "imaginations" campaign) commanded the Prussian Corps, with assistance (?) of his dad, Duane.

Long view of the far French left/Allied (Russian) right flank. Phil and Glen are friends and veteran FoB2 players who asked to slug it out opposite one another... and so they did! William had Ney's command, including all of the Old and Middle Guard infantry, as well as the cream of the Guard Cavalry.

Albert had the French center, Marmont's troops. Historically, they pretty much held the line, using the redoubts (behind them, off table) for support. To his right was Kris (Mother to Alistair, etc, etc), playing St. Cyr's Corps.

Finally on the far French right was Paul, playing Victor's corps, and Tim, as the dashing King of Naples. (Murat) with his Cavalry Corps.
.

I usually "salt" the FoB2 decks for these big convention games by taking one MOVE card and shuffling it in with the top 2 cards of the deck, thus ensuring we get some movement early on in the game. This gets things going, and allows new players to get the hang of how to do the MOVE card mechanics, which usually takes them a few iterations before the light goes on and they "get" it, as mentioned previously. So, the first Impetus roll of the game resulted in the French winning by 2; they went first and promptly turned a MOVE card. Tim then rolled up a "Triple Magic Move" with one of Murat's Dragoon Divisions. The Austrian infantry's fire failed to stop any but one of the cavalry charging hell for leather 2-3 feet across the table, and Robert had no better luck in the melees that followed, resulting in his far left flank being shattered. "Can I form 'emergency square'?". Nope! The two Austrian cards were of no particular use, IIRC, and then the 2 C-in-C's rolled for the next impetus - a tie! In FoB, this means the sequence decks are shuffled. Oh no! May careful plans are disrupted... In keeping with the official Historicon ACW/1863 theme, I'll paraphrase Sherman by saying:
"War is hell, boys!"

After the reshuffle, the French kept turning MOVE cards almost back to back.... while the Allies turned... none. Here Mortier moves his Young Guard out from the Gross Garten to attack the Russians opposite him.

Marmonts' corps attacks into the teeth of a formidable concentration of Allied artillery, including units from the Russian and Prussian Guards! Sometimes getting a lot of MOVE cards early on is NOT the best thing for your troop's health!

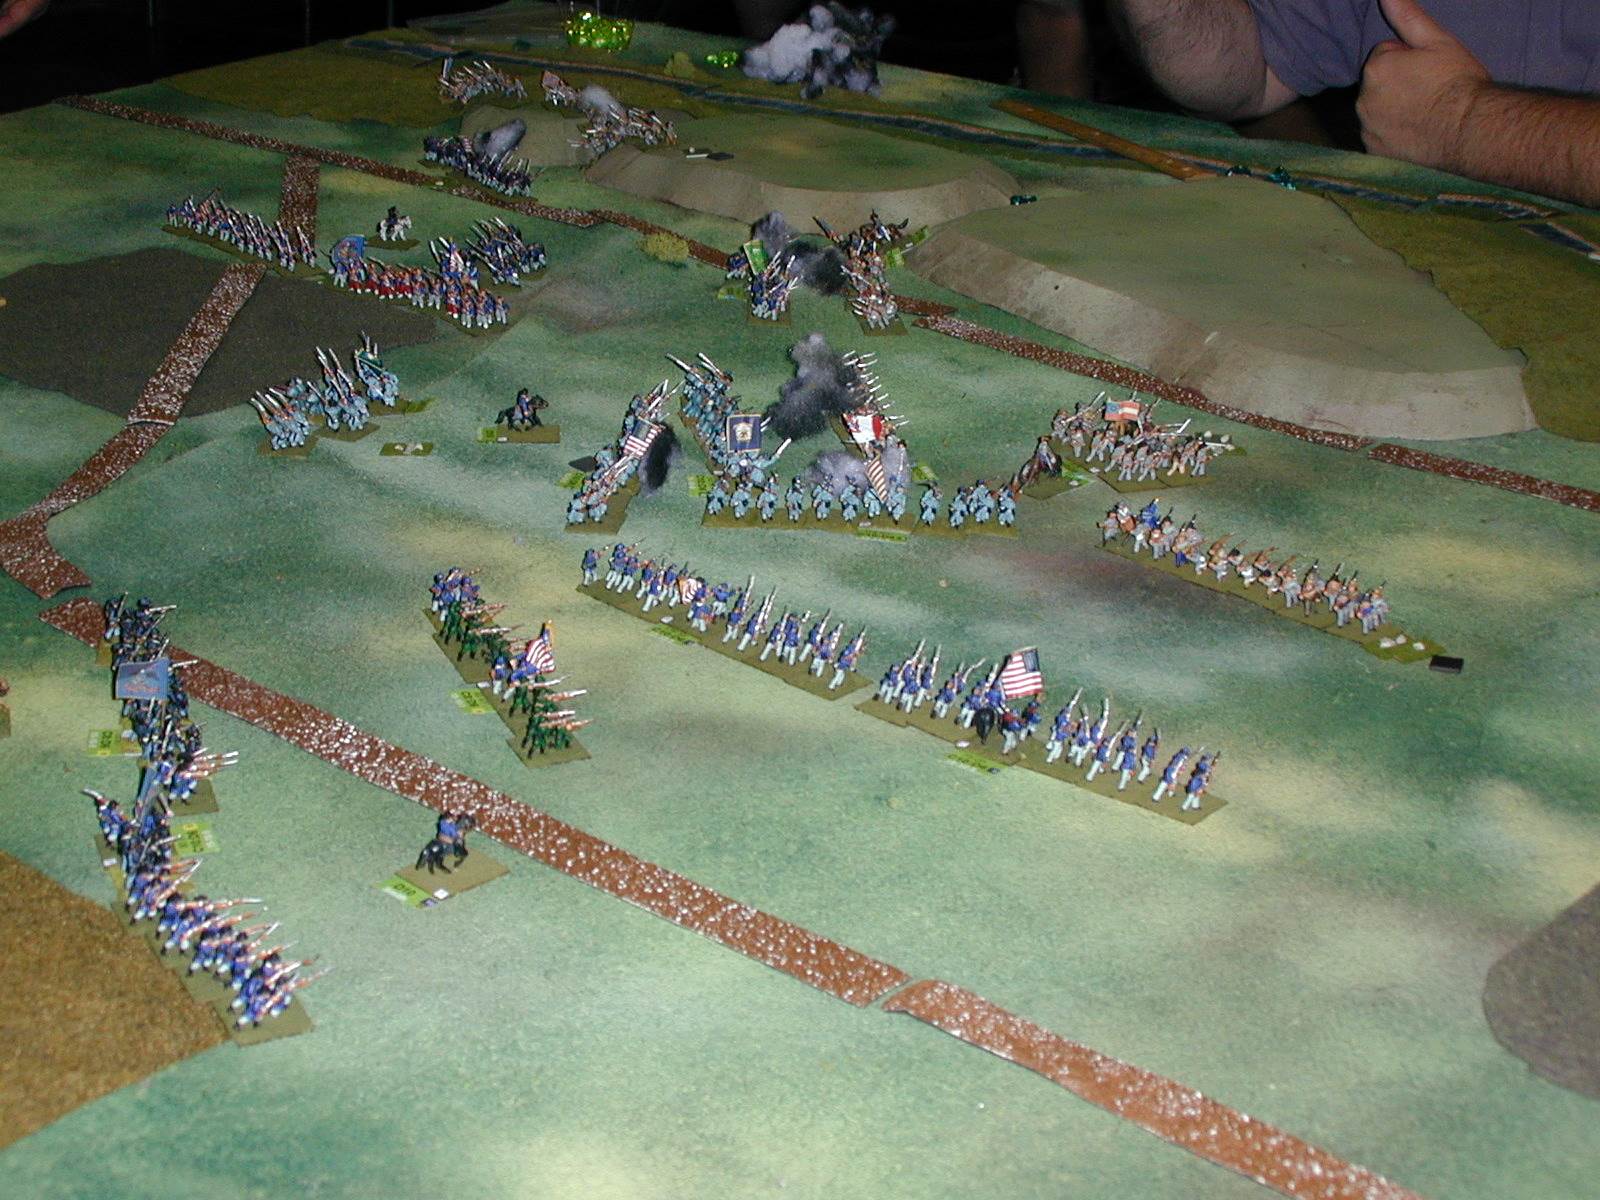
The far French right/Allied left, saw Tim (Murat) and his horsemen ride over regiment after regiment of hapless Austrians. Robert's (Gyulai) artillery did do some damage to Paul's (Victor) approaching infantry supports, but not nearly enough. The Allies did turn a MOVE ONE COMMAND card, and assigned it to Gyulai's outflanked infantry Division in the hopes that it would roll high and even and be able to change formation (to square) or facing, but Robert rolled low and odd, leaving him little to do but pull back slightly from the sound of thundering hoof beats!.

The center of the battlefield - Marmont's Corps bravely, perhaps foolishly, presses home against the Reserves in the center. Historically, most of these elite allied troops saw little or no action that day.

Murat's horsemen destroyed still more Austrians, and then the Allies turned the dreaded Army Morale card (French army Morale cards lead to the death of at least three French Divisional commanders vs. one for the Allies). Gyulai, being out of Corps Morale points, and a LD8 Corps Commander, had to beat the opposing D12 roll.... and failed to do so. His Corps will begin withdrawing from the field, assuming the Allies *ever* get a MOVE card! Robert was a very good sport about it all, observing "If you're going to lose, it may as well be memorable!"

Overview of the Austrian Left at the time that Gyulai's Corps morale collapses. Given the way that the game was going, as GM I inspected the Allied deck, and sure enough - of the last 5 cards, three were MOVE cards. I took the one off the bottom and placed it on the top. The Austrians then won 5 impetus, and counted off their cards to play - putting the MOVE card now at the BOTTOM of the five to be played, instead of the top!. Arrrgh! Some times you can't "fix" a game no matter how you try!

Marmont continues to press the Allied center... but sooner or later, the Allies *will* turn those recalcitrant MOVE cards!

Ney's Guard Infantry and Artillery engage in an artillery duel with the Prussians opposite them.

Murat hasn't even committed the bulk of his Cuirassiers to the fight!

In an unusual gesture of chivalry, Murat's horsemen allow Gyuali to withdraw unmolested. They then change their axis of attack to engage Hessen-Homburg next.

Paul (Victor's) infantry and artillery begins to close on Hessen-Homburg, but despite many shots at them, Steve could roll nothing but 1's, 2's and 3's on D10's and D12's!

The worm turns at last, and the Russian Guard Hussars charge forwards, obliterating a weakened French infantry regiment, as the Russian and Prussian Footguards move up behind them.

Marmont's "Thin Blue Line" facing off against the Allied Guards... doesn't look promising!

On the same Allied MOVE card, the Russians move to counter attack as well.

Not much left after some of the Allied Cuirassiers ride down Marmont's battered infantry.

The Prussian Line Cavalry tries to get into the act as well.

Russian Corps closes in on the Gross Garten.

Mortier's Guardsmen easily repulse the unsupported Prussian Dragoons.

Overview of the French left/Allied right.

The Prussian infantry moves forwards next.

Fresh troops!

St Cyr (Kris, mother of Alistair - I love having gals in my games!) moves forward to engage the Austrian Grenadiers of Hessen-Homburg's command.

St Cyr and Victor closing in on Hessen Homburgs' main position....

with Murat's victorious horsemen in support!

Overview of the French Right as almost ball of Gyulai's troops have retreated off the battlefield.
At this point, we had gone through the deck for both sides, and all of those late arriving Allied MOVE Cards had certainly allowed the Allies to counter-punch! Marmont and Mortier are both near zero Morale Points, but have not broken. Napoleon holds 10 MP in reserve that he can transfer in whole or part to any French Corps on a Leader Check card. Gyulai's Corps has been shattered and is all but of the table. Hessen Homburg is intact but about to come under attack by THREE French corps. Ney's command, including the Old Guard, is intact but the supporting Corps to either side are precarious as above - there was still plenty of play left in this one. However, by now it was 11:30 PM and past the scheduled ending time for the event. Without the "Play until you drop" L.A. guys on the scene, we called it a day. Many of the players plus Barry graciously helped me take the game down. Believe it or not, we had it all packed into my car in about 30 minutes. .. anew speed record for such a large game, I think. Thanks to all the players!
With so many players new to the rules, I made the executive decision to forget the weather rules, as well the varying Allied C-in-C rule, as there was already plenty of complexity to deal with. I was a bit disappointed that Hessen Homburg didn't get into the action until the very end, but sometimes that's how things play out regardless of the plans of the players... or the GM!
I think the scenario as written was fine. I think in the future, for games with more than 2-3 players a side, I will redefine the MOVE ONE COMMAND card as one command *per Corps/player*; that should keep the players more in the game, with less "down" time.
Peter